
Apple device allows the owner to add the email address in FaceTime on the iPhone, iPad, and Mac computers. Your iOS and macOS device is designed to accept a new email as it is happening under the Apple policies. A newbie wouldn’t know how to do this and that is why we are going to cover it in this tutorial.
How to add a new FaceTime email address in iPhone and iPad?
Millions of iPad’s are Wi-Fi editions and don’t have a cellular option in them, and the service utilizes Apple ID to create a communication line between two Apple devices. The Cupertino-based company doesn’t care, whether you are making a video call via iPhone, iPad, or Mac as long as it is coming from an Apple machine.
You have to exit the current email address and enter a new email address to call or receive FaceTime calls.
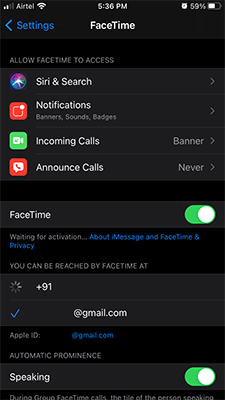
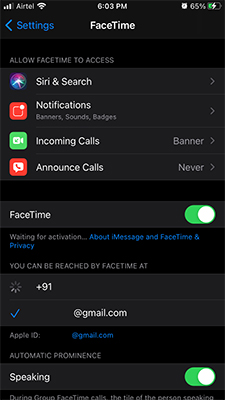
- Fire up Settings > FaceTime.
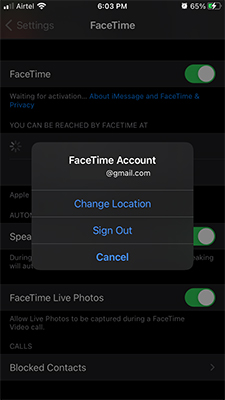
- Tap the “Apple ID” email address in blue color.
- Tap on “Sign Out” to remove it.
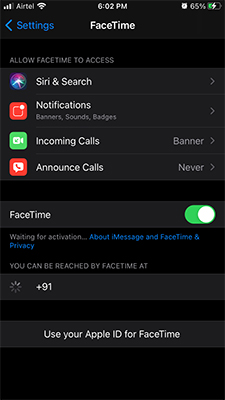
- Choose “Use your Apple ID for FaceTime” to continue.
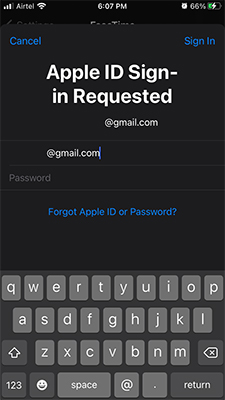
- A pop-up shows up on the screen, and choose “Use Other Apple ID” to continue.
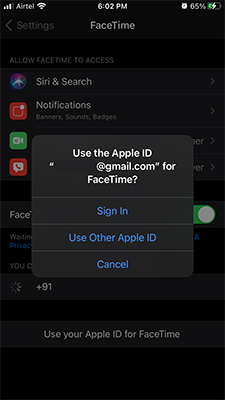
- Enter your Apple ID email address and password, and then tap on “Sign in” to access the FaceTime features.
- Wait for a few moments and let the iPad register the new email address on Apple servers.
Your new email address is ready and intact with the software, and anyone can make a call or text you using the new contact point.
You no longer need an activated number to use iPad (Wi-Fi) FaceTime features, and it doesn’t matter if you have a Wi-Fi edition or cellular edition. The limitation is that you cannot add multiple email addresses as contact point, and it is what it is.
How to add new FaceTime email address on Mac or MacBook?
It is a sophisticated feature that is available in Mac and even in Apple ID web-based dashboard.
- Open System Preferences > Settings.
- Click on “Apple ID” in the system preferences to access advanced functions.
- Choose “Name, Phone, Email.”
- Click on the + button under the ”Reachable At” section.
- Enter the new email address and then click on ”Next” to continue.
- Enter the verification code.
- That’s it, you have successfully added another email address.
- Open the “FaceTime” app from the dock.
- Click on “FaceTime” from the top panel and then choose ”Preferences” to continue.
- Now, choose the new email address under “You can be reached for FaceTime at” and tick the new address.
You have finished the task, and callers can contact you from the new address.