
Apple device owners can share location on iMessage and allow me to guide the readers through the end. Google maps implemented the feature for Android phones, and Apple wanted to provide advanced features that exceed everyone’s expectations. Fortunately, Apple was ahead of everyone else in the market, and they implemented the technology in the iMessage texting platform. Allow me to show readers how they can use iMessage and GPS technology altogether.
How Can I Share My Location in iMessage?
In this tutorial, I will be using an iPhone, and you can implement the same thing on the iPad, and I have already mentioned the limitations below. Make sure to turn on location services that I have already shown below, so make sure to follow it.
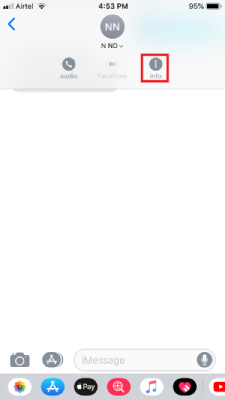
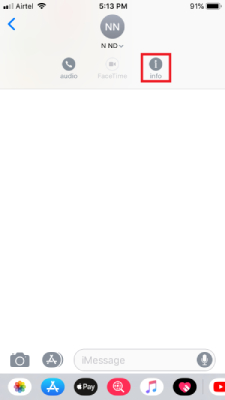
- Open an existing message and click on the contact user or contact number, and then tap on the “Info” button.
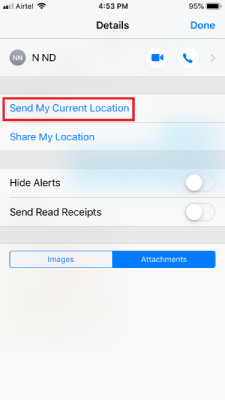
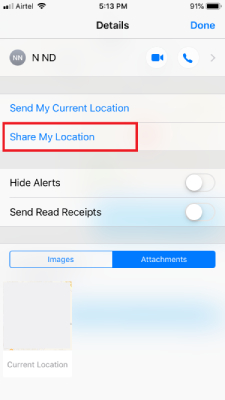
- You have two options available, and you can tap on “Send My Current Location” to send your current location to the recipient.
- The message will be sent instantly.
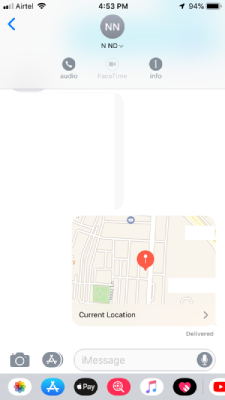
- Tap on the location to view it on the map.
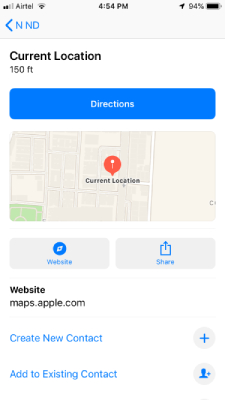
Apple device owners can send current location in the form of compressed photos. Apple compresses the location into an image, and recipients can view 150 meters range in the image. The image will be available across Apple eco-system machines including iPhone, iPad, MacBook, and iMac.
How to Share Live Location in Messages on iPhone or iPad
The Apple device must meet specific requirements because of the technology designed to work a combination of other technology. Read the requirements and then start working on implementing the feature because I don’t want the readers to regret later.
- Again, Open thread and tap on the contact and then select “Info” to continue.
- Select the second option “Share My Location” in the next window.
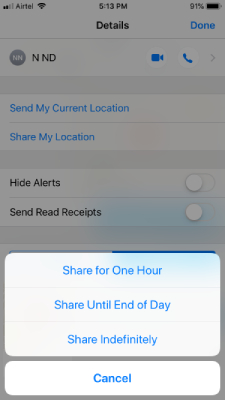
- A small pop-up shows up at the bottom and select one of them to begin the process.
- The option will change from “Share My Location” to “Stop Share My Location” and the indicator will be in red color.
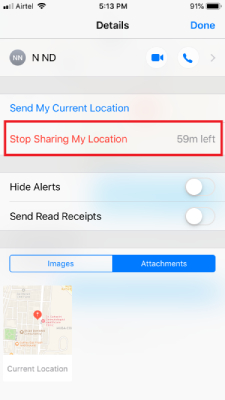
- A new confirmation notification will show up at the bottom of the thread. The notification says “You started sharing location with (Specific Contact Name or Number.) Today 00:00” at the bottom of the screen to remind the users.
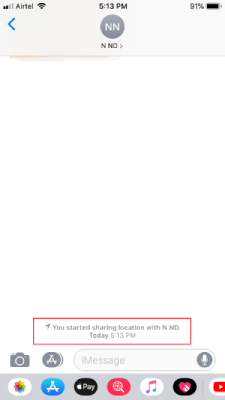
Apple device owners don’t need to worry about forgetting the earlier actions because you will be notified with the notification at the bottom of the Messages thread. You can always turn off the live location sharing function by following the same instructions, and it will turn off instantly.
How to Enable or Turn On Location Services on iOS
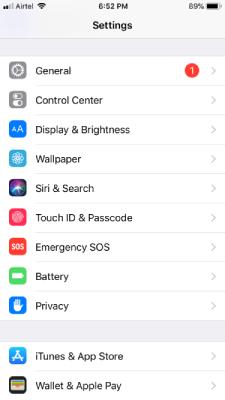
- Tap on the “Settings” and swipe down to find “Privacy” and click on it.
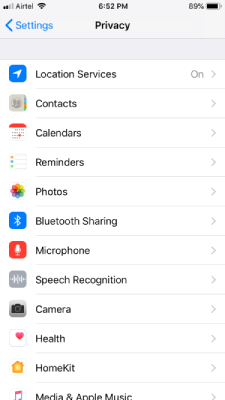
- Tap on “Location Services” to continue.
- Click to enable “Location Services” to complete the process.
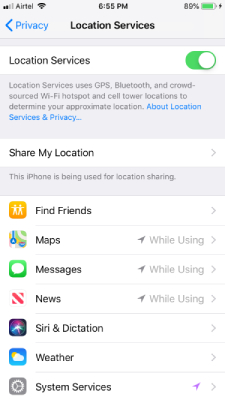
Double-check, whether “Maps” is listed in “While Using” or not. I recommend the readers to keep “While Using” permission to prevent privacy invaders to take advantage of the loophole in the system and maintain privacy.
Remember, iMessages location sharing won’t work, if you don’t have a phone running iOS 11 or above. The recipient should have iMessage enabled in the iOS device, or this function won’t work properly in regular SMS services.