
Apple started to develop iOS mobile platform after the demand for the smartphone increased drastically, and to keep up with the market expectations. Announce Calls on iPhone is a feature that was introduced in iOS 10 back in 2016 and it was indeed interesting for the period. AI Voice Command is a new thing around the block and millions of users already digging the Siri Voice Command.
Furthermore, you can use the Announce Calls on your iPhone on the latest devices, and older-gen devices because it is a software tweak and not hardware-oriented features. In this tutorial, we are going to show you, how you can turn on and turn off Announce Calls on iPhone/iPad supporting iOS 10 or later.
What is Announce Call feature in iOS
Apple utilized Siri AI to recognize saved contacts names and pronounce in the native language or English (USA) language. The voice command informs the users about the incoming calls and speaks out the name of the caller. Of course, it is an innovative feature that was new at the time, and no other mobile operating system could perform it flawlessly. The company outdid themselves and brought something unique on the table.
Overall, Announce Calls is a software-based feature introduced in iOS 10 and you need iPhone or iPad running iOS 10 or later. The feature is available on iPhone 5 to the latest edition launched recently and you don’t need anything else to turn on/turn off it.
How to Turn on and Turn off Announce Calls on your iPhone?
Enable Announce Calls
You can apply the settings on iPad that has SIM card in it, and receive calls from the device. If you are using a Wi-Fi variant, then you won’t have these options in the iPad edition. Stick to the guide because you don’t need additional tools or instructions to enable it.
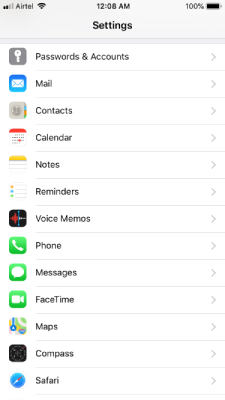
- Tap “Settings” from the menu to begin the process.
- Swipe down to tap on the “Phone” setting.
- Find “Announce Calls” and tap on it to continue.
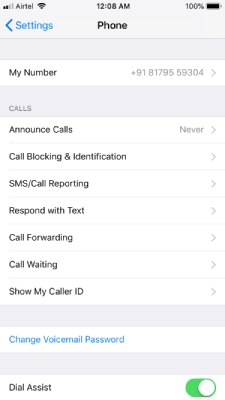
- iOS set “Never” as default, and that’s the original setting. You got four options on the screen and you have to know the differences to select the right one for your preference.
- Always: Siri will announce the caller’s name on speaker, headphone, and wireless audio device. Overall, whenever you receive an incoming call, then it will be announced via all output speakers.
- Headphones & Car: Apple team added another option for users, who want to answer calls during driving or while jogging with headphones on. Siri will announce the name when you are connected via headphones or car (Bluetooth).
- Headphones Only: Siri will announce the caller’s name only when you are connected via wired headphones or wireless audio sets.
- Never: Disable.
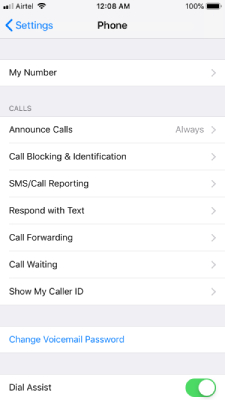
- Tap on your preference, and we have chosen “Always” on our iPhone.

- Go back, and you can confirm the enabled feature from the setting.
Now, it is enabled on the device, and you can double-check the functionality by calling on the phone. It is a handy feature for modern users, but it does attract unwanted attention.
Disable Announce Calls
Apple team did add the option to disable it, and it does attract unnecessary attention from the audience. Privacy is a serious subject in modern society and announcing the caller name on the speaker does break a privacy rule. We had the same issue that drew us to make a final decision to give up on the option, and disable it.
- Open “Settings” and tap on the “Phone” setting.
- Find “Announce Calls” and tap on it to continue.
- Tap on “Never” to disable it.

That’s all you have to do.
Bottom Line
Now, you have learned to turn on and turn off Announce Calls on iPhone & iPad. The instructions remain the same on iOS 10 and iOS 15 version, so don’t worry about the interface differences. The AI Siri Voice Command feature works flawlessly for English speakers and has odd pronunciation for non-native names.