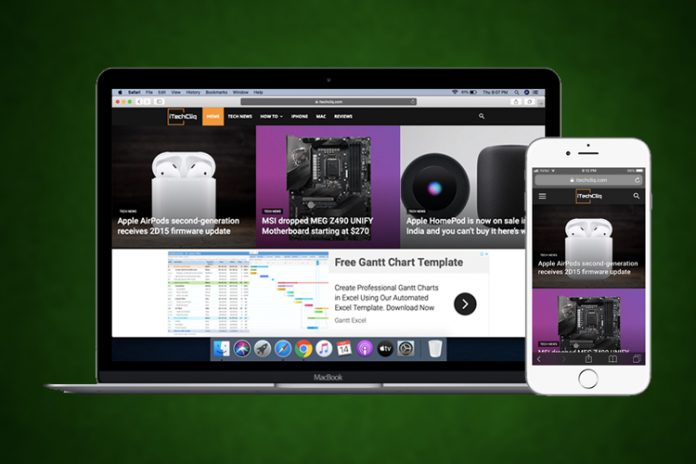
Apple Safari is the default browser in iOS and macOS operating system. You can enable and use Private Browsing Mode on Safari in a few clicks and I will guide the readers through the process. Fortunately, Apple added Private Mode in Safari, which is a blessing because I think the iOS default browser brings pleasant experience.
What is the Private Mode Browsing?
From Google to Mozilla, everyone is adding Private Mode or Incognito Mode or InPrivate Mode to the browsers. Many users assume that “Private Mode” hides the IP address of the user and keeps them anonymous from the world. That’s not true at all because Private Browsing Mode designed to eliminate “browsing history” and keep website & advertising trackers away from you. Remember, only a handful of browser support tracking elimination add-on enabled, and I don’t think the mobile version of Safari supports tracker blocker.
How to use Private Mode in Safari on the iPhone or iPad
The apple-designed iOS for iPhone and it comes with Safari pre-installed. Our second choice is Chrome, but we will get to that later on, so you can understand the technique here. The Safari browser supported by a wide-range of previous-generation operating systems, so I don’t think compatibility is an issue here.
- Tap on the “Safari” icon to open the application.
- Tap on the multiple window icon located at the bottom right.
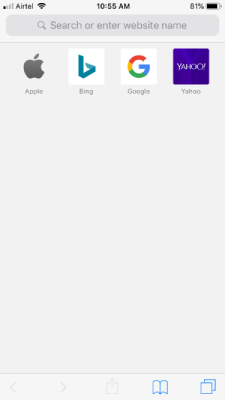
- Now, tap on “Private” which is located at the bottom left.
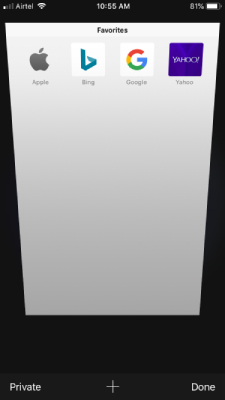
- There are no windows open, so tap on the + button located at the bottom to add the window.
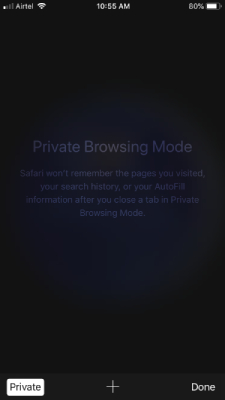
- You are in “Private Mode.”
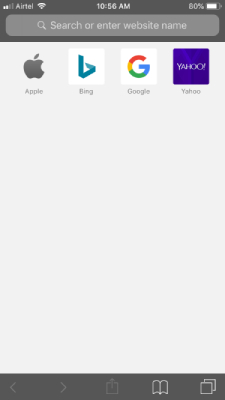
One of the strongest points of the Safari browser is that you don’t have to open this mode manually every time the application is launched. Many applications open websites in the default browser and Safari views it for you, where you have left. If I have left the browser in Private Mode, then it opens the external website link in the Private Mode and that’s the beauty of Apple’s creation.
Is Safari Private Mode is missing on iPhone? Here’s how you can enable it
Apple added enough parental control options for the consumers because youngsters and parents use most of the iPhone want to restrict access. You can disable the function to use Private Mode and you don’t even need Apple ID credentials or Touch ID or Face ID to confirm the changes.
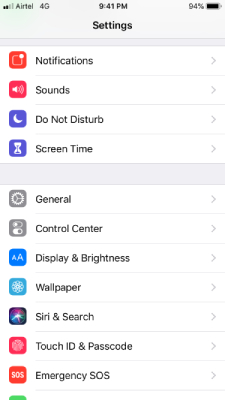
- Tap “Settings” to open it.
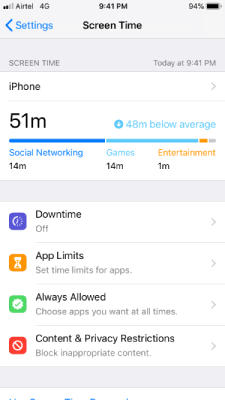
- Swipe down and click on “Screen Time” to continue.
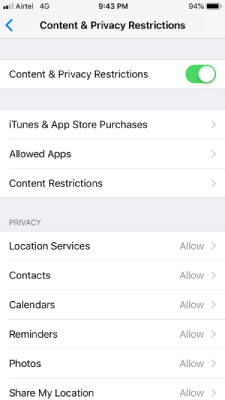
- Tap on “Content & Privacy Restrictions” to begin the process.
- Click “Content Restrictions” to view more.
- Tap on “Web Content” to continue.
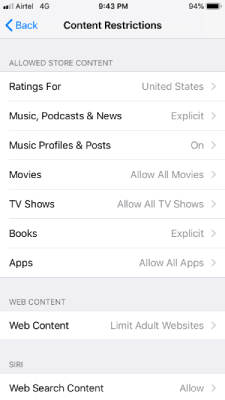
- Select “Unrestricted Access” or “Limit Adult Websites” to complete the process.
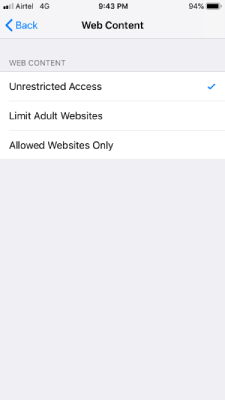
Now, you have successfully removed restrictions and browse the internet in Private Mode.
How to use Private Mode in macOS?
I strongly suggest the consumers use Safari in macOS because it is modern, faster, secure, and private. You can also use Firefox in macOS because it is an open-source project that is not controlled by corporate companies and independent private organizations. However, I do use the Safari browser in Apple developed operating systems because they are simply fast and powerful in 2020.
- Launch Safari from the dock.
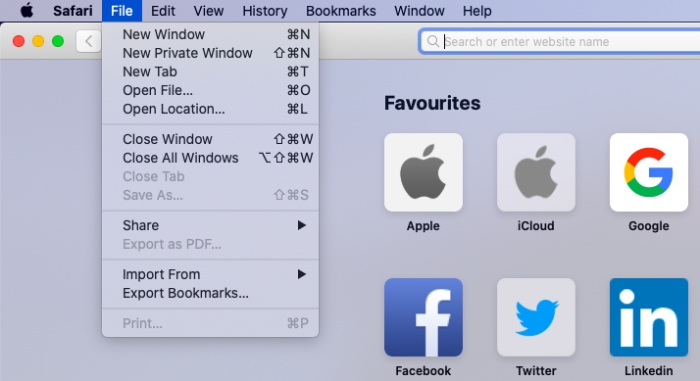
- After Safari is opened, tap on “File” located in the toolbar.
- Click on “New Private Window” from the drop-down menu.
- You can confirm it by checking the “Search Field” is in the dark color or white color. Remember, the private mode is always in dark color or grey color, and that’s how you can confirm it.
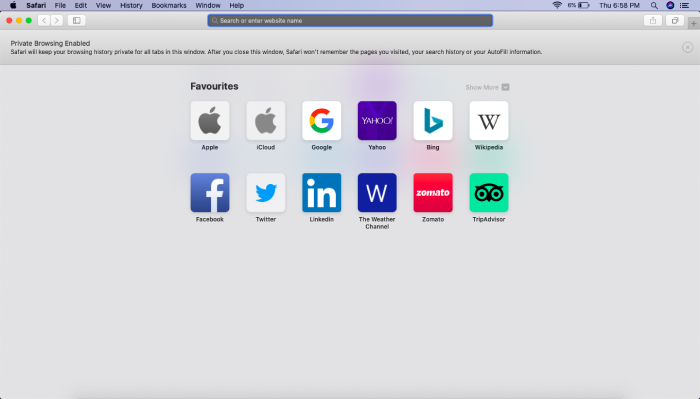
Meanwhile, you can exit the “Private Mode” by opening a new window by following the same instructions and you have to select “New Window” instead of “New Private Window” to open the regular browser.
Is Private Mode missing on Mac? Here’s how to fix
Apple macOS Catalina is a desktop-class operating system, and the company added parental control features. The private mode is restricted under the parental control policy, and you can disable NSFW content using the Screen Time feature.
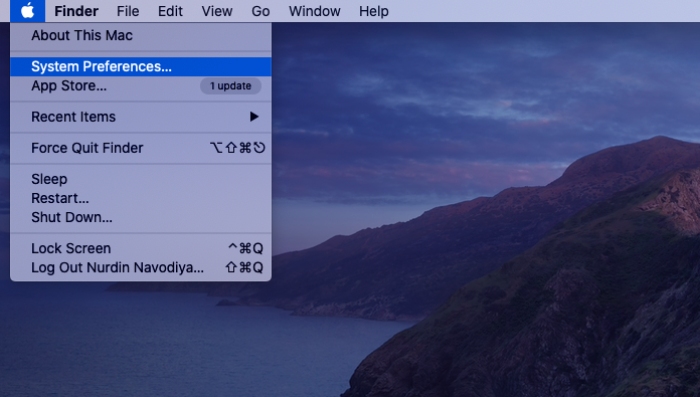
- Click on the Apple menu to select “System Preferences.”
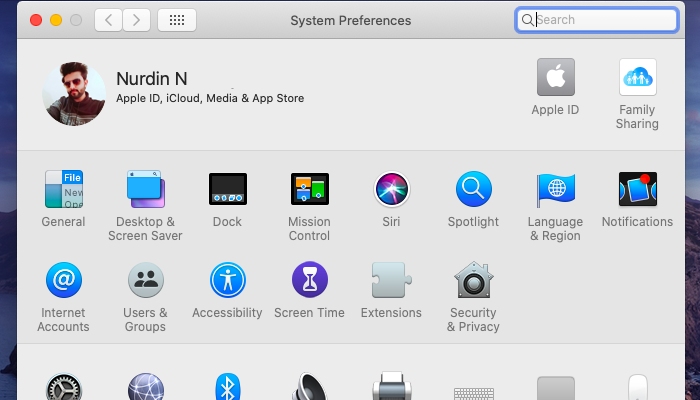
- Click on the “Screen Time” to continue.
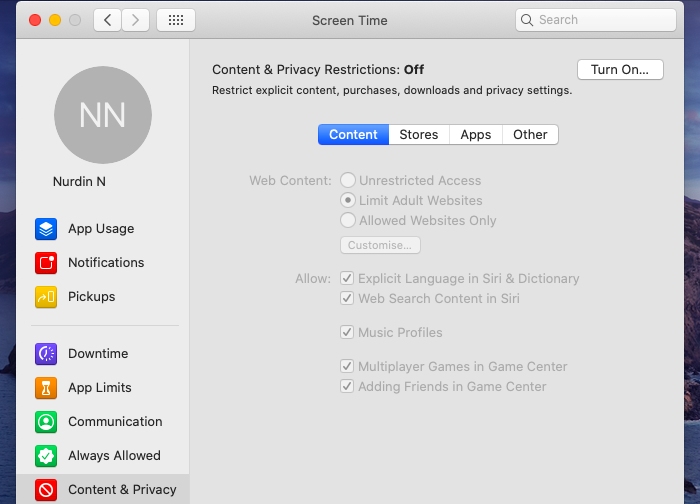
- Tap on the “Content & Privacy” and then click on the “Turn On” option that is located at the top right side corner.
- Now, look for “Limit Adult Websites” and change to “Unrestricted Access”.
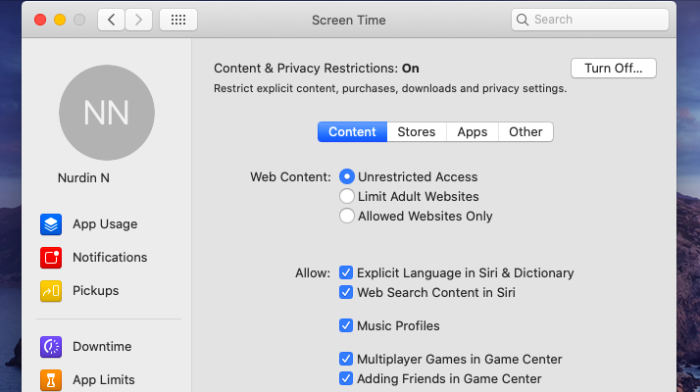
Now, you have successfully disabled the restrictions in macOS Catalina. You can also turn off the Content & Privacy to fix this problem.
Bottom Line
Private Mode in Safari plays an important role in my daily life. I did not cover iPadOS separately because it is an enhanced version of the iOS mobile operating system, and there isn’t much difference in both operating systems.


