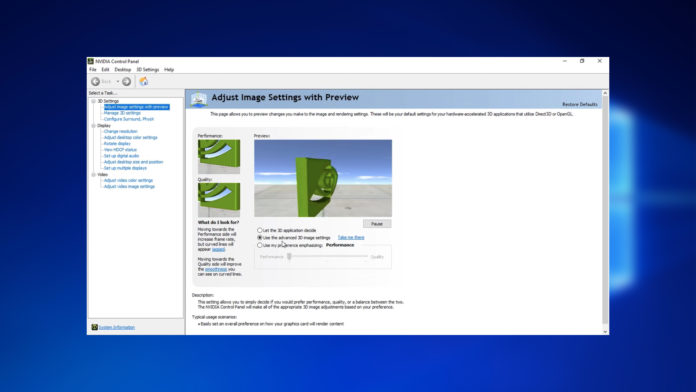
Hardly anyone on the PC gaming scene is a stranger to the NVIDIA brand name. Why is the manufacturer so popular? Because it offers a powerful graphics processing unit and makes it affordable for a large segment of the gaming community.
But while NVIDIA cards strike a great balance between price and performance, some of them can run into minor issues now and then. One of these that frequently bother users is that the NVIDIA control panel application just disappears. If this sounds like a problem you’re experiencing right now? Don’t worry, this article is only for you.
Missing NVIDIA Control Panel? Here are some fixes
Nobody seems sure why this seems to happen. Of course, there can be a set of factors that could lead to your NVIDIA control panel vanishing. Fixing a problem is generally easier when you know what causes it. Before getting into fixing the problem, here are a few reasons that could be the culprit:
- Outdated or incompatible device drivers.
- Upgrading to a new OS or update patch.
- Windows registry could be incorrect or missing.
- NVIDIA control panel could have become corrupted.
- Some general bugs are associated with Windows 10.
These are not the only causes behind an NVIDIA control panel issue. Technology can often behave in unexpected ways. However, they do tend to be the most frequent. And addressing them usually tends to fix the issue. If you keep encountering control panel problems, try the fixes below:
Try Unhiding it in System Tray
The control panel can often simply be hidden from your system tray. People often do this themselves without realizing it. Sometimes, a third-party application could also force hide the NVIDIA icon in the tray. This can make it appear like the NVIDIA control panel is missing when it is simply hidden. Unhiding the control panel is fairly simple. Use the search bar or press the Win+S keys. Search for the NVIDIA control panel and look for the right icon in the search results.
- Alternatively, you can head to your Windows Control Panel.
- From here, choose the NVIDIA Control Panel icon.
- Open the control panel, and right-click on the top description menu.
- Select the Add Desktop Context Menu and Show Notifications Tray options.
- If they are already selected, leave them as is.
Close the NVIDIA Control Panel and check your system tray to see if this worked.
Restart NVIDIA Devices and Servers
Like many other applications, NVIDIA keeps certain software and services running around the clock on your PC. While these are typically essential to getting the best out of your GPU, sometimes they can freeze up or develop minor bugs. Sometimes this causes problems like the control panel missing. Fixing this is usually a simple proposition. All you have to do is to restart all NVIDIA services. Bring up the Run Utility video by pressing Win+R. Open the services window by typing in services.msc. Once there, locate the service titled “NVIDIA Display Container LS”.
Right-click to open the options menu, and select the restart option. Do the same for all NVIDIA services on your PC. Allow your PC a few minutes to restart these services. Then check your desktop and systems tray for the NVIDIA control panel icon.
Use Task Manager to Manually Open It
If the above two steps did not work for you, you can always try to force the panel open. The Windows Task Manager can help you do this. Switch to the detailed mode if your task manager launches in compact mode by default. Scroll down the Processes list for NVIDIA Container. There can be multiple versions, but you can choose any one of them for the next step. On NVIDIA Container, open the context menu with a right-click and choose Open File Location.
This will take you to the NVIDIA folder. Head up to the main NVIDIA Corporation folder, and look for a subfolder titled “Control Panel”. Find the nvcplui.exe file and right-click to choose Run as Administrator. You may have to punch in a password to do so. Once done, the NVIDIA panel should be ready for use.
Check for Driver Update (NVIDIA)
Keeping your GPU driver is very important to get the best performance out of it. You can almost always expect a big new Windows update to mess with compatibility. However, it is fairly simple to locate drivers, especially if you know what card you are using. Look for your card’s model number, either in your PC Devices or on the manufacturer’s website. Both will be able to tell you if you are using an outdated or damaged display driver. From there, it is simply a matter of finding the right driver and downloading it.
Once downloaded, all you have to do is follow the on-screen instructions to install it. A successful installation may require you to restart your PC. Always be sure to download the correct driver for the card you are using. Whenever in doubt, look for the right version with a simple Google search. Or you can always speak to someone at your manufacturer’s customer service or technical support department. They should be able to help you identify and install the right drivers for your hardware.


